Turuncu Dental Clinic - Antalya, Turkey

All-on-4 dental implants are a perfect solution for individuals without teeth. This treatment option uses only four implants to provide a stable dental prosthesis. However, proper cleaning of these implants is critical to maintaining their longevity and a healthy mouth. In this article, we will cover the steps and important tips for cleaning All-on-4 dental implants or All-on-6.
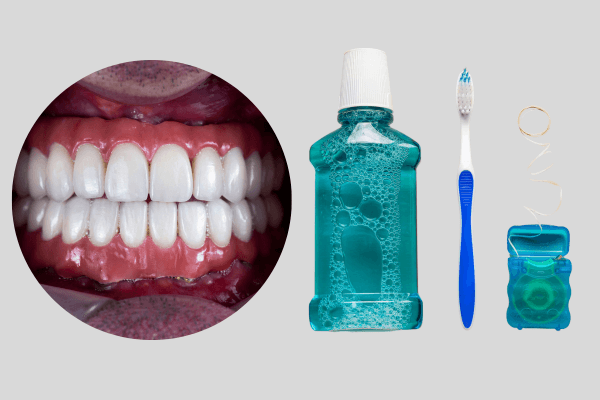
To clean all-on-4 dental implants, you will need cleaning tools such as a soft-bristled toothbrush, dental floss, mouthwash, oral irrigator, and an antibacterial mouthwash.
Brushing your teeth twice a day, in the morning and in the evening, is the most basic step in cleaning your All-on-four implants. Using a soft-bristled toothbrush, brush your gums and the areas around the implants.
Flossing involves cleaning the areas between implants and below the gum line. Remove plaque and food debris by gently working your way past healthy gums. Flossing around All-on-4 or All-on-6 dental implants are very important to maintain good oral hygiene and prevent gum disease. More detailed information about how to floss all-on-4 dental implants is provided below.
Materials needed:
Dental floss (unwaxed or cotton and thicker implant-specific floss)
Floss threader (optional but recommended for easier access)
Be sure to wash your hands thoroughly to ensure cleanliness before you begin.

Cut a piece of dental floss about 15-20 inches long. If you use dental floss specific to the implant, it is designed to be thicker and made of cotton so as not to damage the area around the implants.
If you have a floss threader, it may be helpful to provide easier access around the implants. Pass one end of the floss through the loop of the threader.
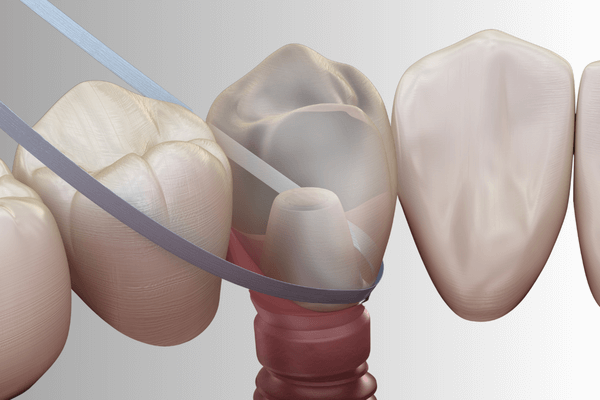
Gently slide the dental floss or floss threader between the two teeth. When flossing around dental implants and under permanent dentures, be very gentle so as not to damage the surrounding gum tissue or irritate the implant.

Twist the floss around the base of the implant and gently move it up and down. Be careful not to force the floss down or break it, as this can be harmful.
After cleaning the area around the first implant, move on to the next space. Use a new floss for each new area to prevent bacterial transfer.
Floss Between Natural Teeth
If you have natural teeth remaining next to the implants, be sure to floss between them as well. Proper flossing protects overall oral health.
Throw it away After flossing, rinse your mouth with water or an antimicrobial mouthwash to remove dislodged plaque and debris. Throw away used dental floss.
Be Gentle: Avoid aggressive flossing as it can irritate the gums and potentially damage the implant site.
Avoid Breaking the Floss: Do not force the floss. If it's too tight, use a floss threader or try a different type of floss.
Use Implant-Specific Floss: If possible, consider using dental floss designed specifically for dental implants, as it may be gentler on the implant area.
Regular Checkups: Do not skip your regular dental checkups. Your dentist will advise on proper oral hygiene practices.
Flossing is as important as brushing in preventing gum diseases and maintaining oral health. It is ideal to floss at least once a day.
The best time to floss is before brushing your teeth. According to research, flossing before brushing your teeth and before going to bed provides more effective oral hygiene.
Remember that maintaining good oral hygiene practices, including flossing, is crucial to the long-term success of your All-on-4 dental implants. Don't hesitate to contact us if you have any concerns or questions.
A mouthwash provides cleanliness by killing bacteria in the mouth. Using a suitable antibacterial mouthwash reduces microorganisms in your mouth.
Having All-on-4 dental implants checked regularly by a professional dentist is essential. These checks are vital to detect and treat any potential problems early.
An oral irrigator is a device used to support oral and dental hygiene. It is operated by spraying water into the mouth with a slight pressure. This is an effective dispersion of cleaning food debris and plaque from the teeth. Oral irrigators are preferred as a complementary cleaning tool to tooth brushing and flossing.
They avoid hard toothbrushes because they can scratch the implants.
Pay attention to the friction of your toothpaste.
Harmful health of implants due to avoidance of tobacco products.
Avoiding hard foods and avoiding extremely hot or cold foods.
All-on-4 dental implants are provided for a lifetime with proper cleaning and care. By following the steps above, you can ensure the fit and longevity of your implants. It is also important that you do not neglect regular dentist check-ups.